Table of Contents
ToggleIntroduction
The Individual Offer app for Shopware allows your customers to quickly and easily create an offer request from the shopping cart, by clicking the Offer Request link (instead of proceeding to the checkout).
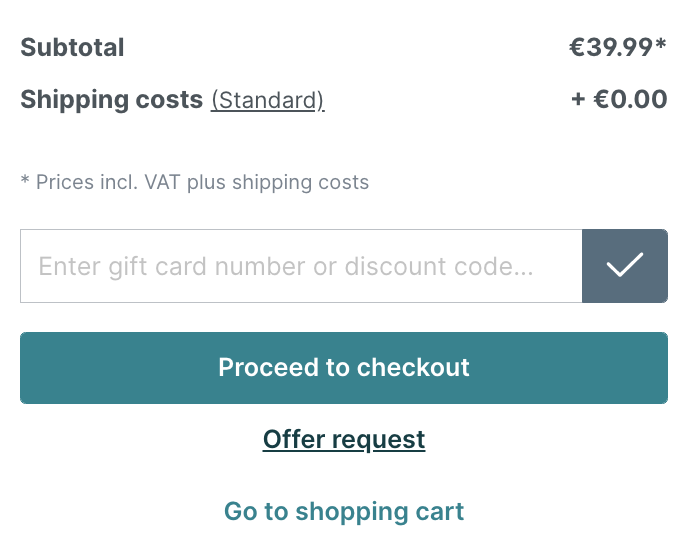
You can process this request in the shop administration and assign individual offer prices for the articles or reject the request. After accepting the offer, your customer finds the offer in their customer account and can generate an order from this offer.
Advanced functionality is also offered, such as two-way messaging with the customer, offer expiry dates and fully customizable fields.
Pre-requisites
The app can only be installed on a self-managed Shopware environment running at least version 6.2.0.
Installation
Install the app via Extensions > My Extensions. After installation, configure the app by selecting My Extensions > Individual Offer > Configuration.
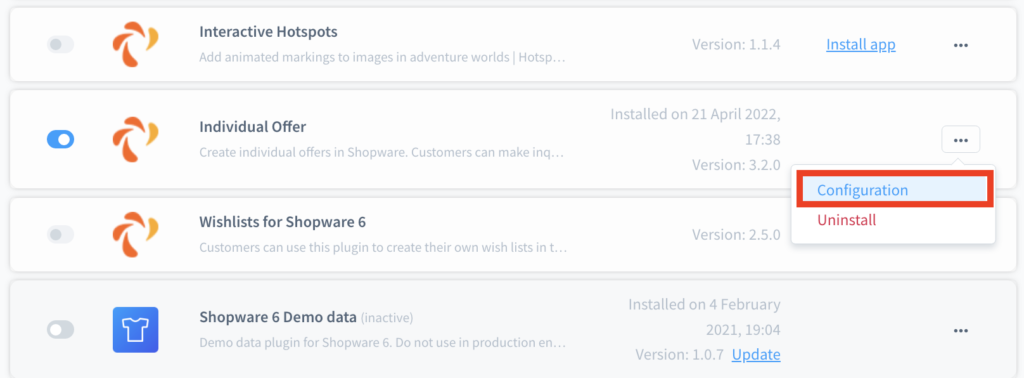
Configure each of the settings described in the following sections.
General properties
Configure the settings in the General Properties panel as follows:
| Setting | Type | Description |
| Activate offer request in cart | Toggle | Enable this setting to display the Offer request button on the cart page. |
| Activate offer request in offcanvas cart | Toggle | Enable this setting to show the Offer request button in the offcanvas cart. |
| Offers downloadable | Toggle | Enable this setting to allow customers to download a PDF version of any offer they have been made. |
| Customers can send messages | Toggle | Enable this setting to allow customers to send messages to the shop administrator regarding any offer they have been made. Administrators can reply to any messages received by customers. |
| Clear basket after offer request | Toggle | Enable this setting to automatically clear a customers basket after they request an offer. |
| Create offer instantly | Toggle | Enable this setting to automatically create an offer when an offer is requested. |
| Minimum basket value for offer request | Numerical input | Enter an amount here that determines the minimum basket value before a customer can request an offer. |
| Default period of days an offer is valid | Numerical input | Enter the number of days an offer is valid before it is automatically withdrawn. |
| Form field “your sign” on offer request | Toggle | Activate this option to enable your customers to transfer their signature directly when they request an offer. |
| Default comment | Free text input | Use this field to add a default comment to all offer PDFs. The default comment is prepopulated on the offer and can be customized as required for each offer. |
| Disallow customer group | Dropdown menu | If you have defined any customer groups, you can specify them as excluded from offers by selecting them from the dropdown menu. |
Email properties
Configure the settings in the Email Properties panel as follows:
| Setting | Type | Description |
| Email address for notifications | Email input | Enter the email address for notifications to be sent to the administrator. |
| Sender email address | Email input | Enter the originating email address for notifications to be sent to the customer. |
| When an offer is created send the offer as PDF with the email | Toggle | Enable this setting to automatically send a PDF of an offer by email as soon as it is created. |
| Infomail to customer: admin declined offer | Toggle | Enable this setting to automatically send an email to the customer when an offer of theirs is declined by the administrator. |
| Infomail to admin: customer declined offer | Toggle | Enable this setting to automatically send an email to the administrator when an offer is declined by a customer. |
| Infomail to admin: customer created offer request | Toggle | Enable this setting to automatically send an email to the administrator when a customer creates an offer request. |
| Infomail to customer: admin created offer | Toggle | Enable this setting to automatically send an email to the customer when the administrator creates an offer request for them. |
Email templates
The Individual Offer app includes email templates for all common scenarios which are located in Settings > Email Templates. These templates are described in the table below.
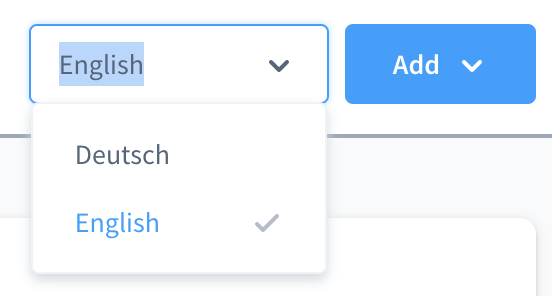
| If your shop environment supports multiple languages, templates are included for each language. Use the language selector dropdown to switch between languages. |
| Email template | Description |
| Offer created info to customer | Sent to the customer to inform them an offer has been created for them. |
| Offer declined by admin | Sent to the customer to inform them an administrator has declined an offer. |
| Offer declined by customer | Sent to the administrator to inform them the customer has declined an offer. |
| Offer message from admin | Sent to the customer to inform them an administrator has sent them a message regarding an offer. |
| Offer message from customer | Sent to an administrator to inform them a customer has sent them a message regarding an offer. |
| Offer request from customer | Sent to an administrator to inform them a customer has requested an offer. |
Each email template can be edited, duplicated or deleted by clicking the corresponding “…” menu button for a template and selecting Edit, Duplicate or Delete, all of which are standard Shopware Administration options.
| Editing email templates is an optional, advanced step and should only be carried out if the standard email templates are not suitable for your shop, e.g. to adjust the wording. |

Editing an email template
From the Edit Email Template screen, modify the properties of the email template as required, using the following fields, then click Save.
Any dynamic elements within the email subject and body are represented by strings such as {{offer.customer.salutation.letterName }}. Modifying these strings may result in emails not displaying dynamic elements correctly, such as the customer name.
| Setting | Panel | Type | Description | |
| Type | Information | Dropdown menu | The type is a predefined value that is required for identifying the correct scenario for an email template. Do not change this setting for the standard email templates as this will cause issues with the app. | |
| Description | Information | Free text input | Enter an optional description for the template. | |
| Subject | Options | Free text input | Modify the default email subject header text New offer as required. The string {{ offer.offerNumber }} allows for dynamic display of the relevant offer number and should not be modified. | |
| Sender name | Options | Free text input | Default is the string {{ salesChannel.name }} which allows dynamic displays of the sales channel. This should not be modified. | |
| Upload file | Attachments | File explorer | Upload any files you wish to include as attachments for the current selected email template, such as terms and conditions or a privacy policy. | |
| Plain text | Mail text | Free text input | Modify the default plain text version of the email body. There are various strings here which allow for dynamic elements within the email text, these should not be modified. | |
| HTML | Mail text | Free text input | Modify the default HTML text version of the email body. There are various strings here which allow for dynamic elements within the email text, these should not be modified. |
Duplicating an email template
Selecting the Duplicate option creates a copy of that email template and opens the Edit Email Template screen (see previous section).
Deleting an email template
Do not delete the standard email templates as this will cause problems with the app. Any additional templates you create can be deleted without causing any issues.
PDF settings
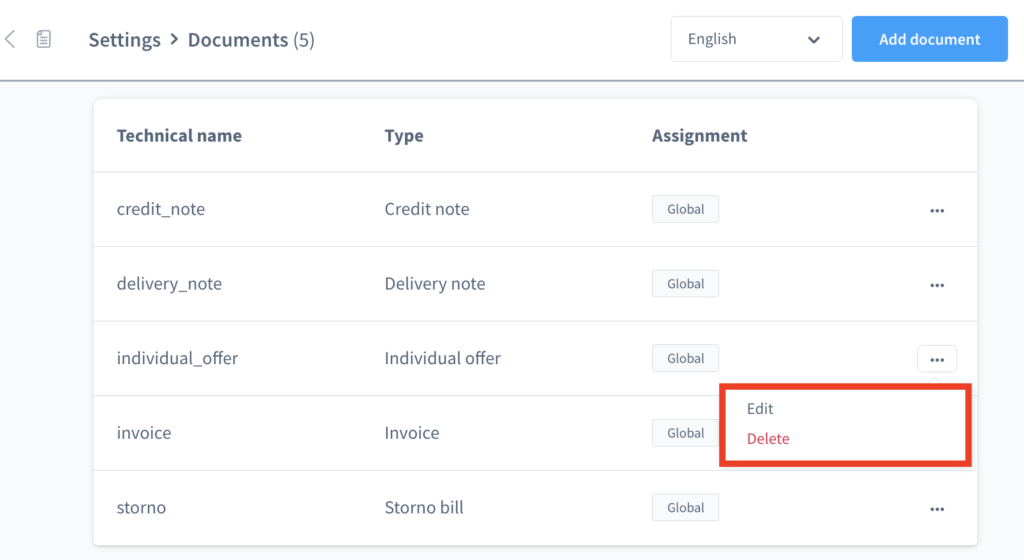
The PDF settings allow you to fully customize the PDF that is generated and emailed to the customer when an offer is created. Access the PDF settings via Settings > Documents, then click the Edit button for the entry individual_offer.
Settings
The settings area contains general configuration options for the PDF, such as the company logo, page format and number of items per page.
| Setting | Type | Description |
| Technical name | Free text input | The unique identifier for the app. Do not change this value as it is required to identify the document draft for generating the offer PDF. |
| Company logo | Image selector | Upload a new company logo or select an existing image from the gallery of previously uploaded images. |
| Filename prefix | Free text input | Enter the prefix for files created by the Individual Offer app. The default is offer_. |
| Filename suffix | Free text input | Enter a suffix for files created by the Individual Offer app (optional, no suffix by default). |
| Page orientation | Dropdown menu | Select Portrait (default) or Landscape. |
| Page format | Dropdown menu | Select A4, A5, Legal or Letter. The default is A4. |
| Items per page | Numerical input | Enter the number of line items that should appear on each page. The default is 10. |
| Display header | Checkbox | By default, headers are displayed. Uncheck the box to disable headers. |
| Display footer | Checkbox | By default, footers are displayed. Uncheck the box to disable footers. |
| Display page count | Checkbox | By default, the number of pages and current page number are displayed. Uncheck the box to disable page numbering. |
| Display line items | Checkbox | By default, line items are displayed. Uncheck the box to disable line items. |
| Display line item positions | Checkbox | By default, line item positions are displayed. Uncheck the box to disable line item positions. |
| Display prices | Checkbox | By default, prices for each item are displayed. Uncheck the box to disable prices. |
| Display document in “My Account” | Checkbox | Activate this setting to allow the customer to access the document via their My Account page. |
Company settings
The company settings area contains company-specific configuration options such as company contact details, VAT number and bank details.
| Setting | Type | Description |
| Display company address | Checkbox | By default, the company address is displayed. Uncheck the box to hide the company address. |
| Company address | Free text input | The registered address of your company. Enter a new text string to change the company address. |
| Name | Free text input | The company name. Enter a new text string to change the company name. |
| Email address | Free text input | The company email address. Enter a new valid email to change the email address. |
| Phone number | Free text input | The company telephone number. Enter a new valid phone number to change the company telephone number. |
| Website | Free text input | The company website address. Enter a new valid URL to change the company website address. |
| Tax number | Free text input | The company’s tax number. Enter a new valid tax number as required. |
| Tax office | Free text input | The company’s registered tax office. Enter the name of the tax office as required. |
| VAT Reg. No. | Free text input | The company’s registered VAT number. Enter a valid VAT number as required. |
| Bank | Free text input | The company’s bank. Enter the name of the bank as required. |
| IBAN | Free text input | The company’s IBAN number. Enter a valid IBAN number as required. |
| BIC | Free text input | The company’s BIC number. Enter a valid BIC number as required. |
| Place of jurisdiction / Commercial register No. | Free text input | The place of jurisdiction (city) or commerical register number. Enter either of these as required. |
| Place of fulfillment | Free text input | The place of fulfillment for legal disputes. Enter a location as required. |
| Business executive | Free text input | The managing director or CEO of the company. Enter the person’s name as applicable. |
Assignment
The setting Document Type cannot be modified.
Custom fields
Custom fields are supported for every offer, via the Custom Fields panel on the offer detail page. To use custom fields, you must first create them in Shopware as follows:
- Access Settings > System > Custom fields.
- Select Individual Offer.
- Click Add New Set and complete the fields described in the table below.
- Click Save.
| Setting | Type | Description |
| Technical name | Free text field | Unique identifier for the custom field. It must be unique and cannot be modified once the custom field has been saved. |
| Position | Free text field | Enter the position for the custom field (numerical value). |
| Manage labels in all administration languages | Toggle | Activate this setting to allow multiple language variants for the custom field. |
| Label | Free text field | Enter the label text for the custom field. If multiple language variants setting is activated, enter the label text in each supported language. |
| Assign to | Dropdown menu | Select a category to associate the custom field with. |
| You can also edit existing custom fields from this page by clicking the “…” menu button and selecting Edit. |
Displaying custom fields in the storefront
To show custom fields in the storefront, you must implement template changes in your theme or via an extension.
For example: if you have created a text field with name prems_individual_offer_offer_test
you could create a new file resources/views/storefront/page/individual_offer/index.html.twig in your theme.
Insert the following code to display the custom field:
{% sw_extends "@Storefront/storefront/page/individual_offer/index.html.twig" %}

{% block page_account_offers_table_order_number %}
{{ parent() }}
{% if order.customFields.prems_individual_offer_offer_test is defined %}
Your label test text: {{ order.customFields.prems_individual_offer_offer_test }}
{% endif %}
{% endblock %}
Managing offers
Offers overview
To access an overview of all requested offers, select Customers > Offers.

Edit individual offer
To edit an offer, click the corresponding “…” menu button for a template and select Edit.
| You can also delete an offer from this page by clicking the “…” menu button and selecting Delete. Deleted offers cannot be restored. |
The following tabs are available from the offer detail screen, these are described in the next sections:
- Overview/Status
- Items
- Settings
- Messages
- Comments
Overview/status
The Overview/status screen provides a summary of the selected offer request.
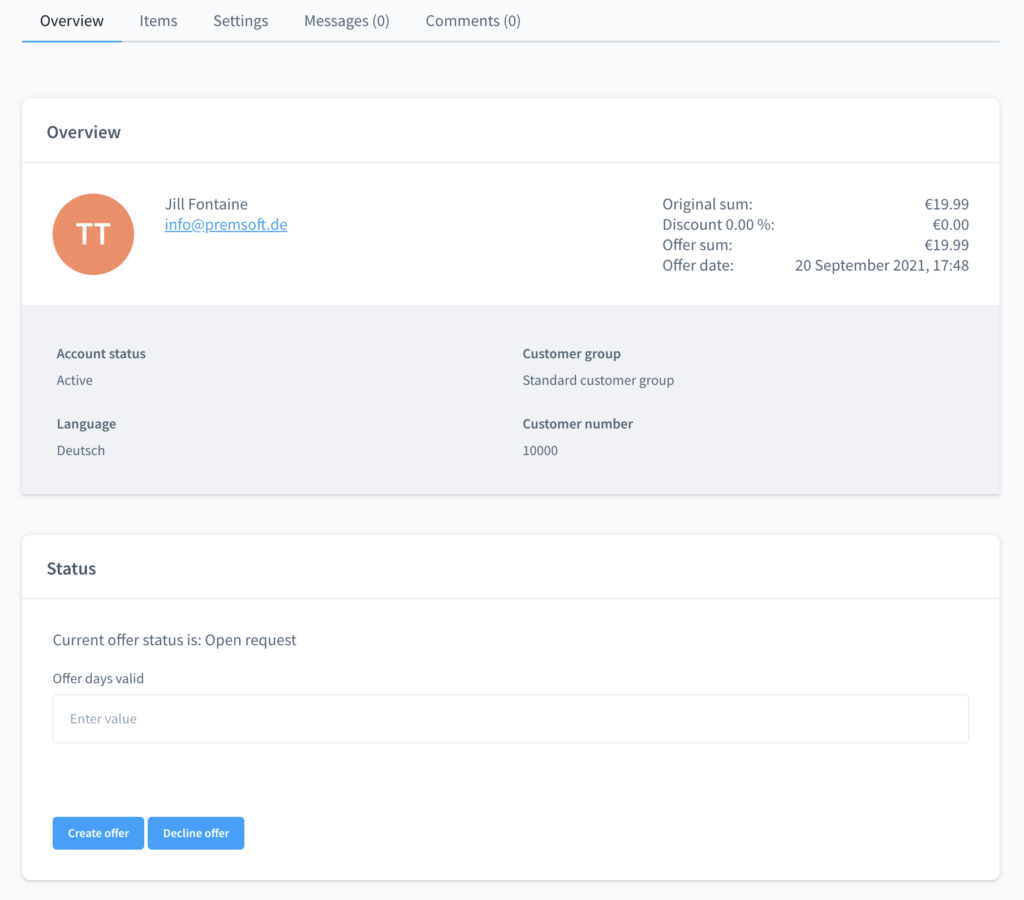
- Information such as the original sum, discount, offer sum as well as the customer’s contact details are displayed in the Overview panel.
- The Status of the offer is displayed underneath.
- Click Create offer to generate an offer from the customer’s offer request.
- Click Decline offer to decline the customer’s offer request.
Items
The Items screen displays a list of all the items included in the selected offer request, separated into the following columns:
- Name
- VAT
- Old price
- Purchase price (gross)
- Quantity
- %
- Offer price
Adding a catalog product
While the offer is in the status Open Request, add additional items from the catalog from the Items screen as follows:
- Click Add Product. A new line is added to the offer item list.
- Double click the field Name and use the dropdown field to select an existing catalog item.
- Click the tick ✔ icon when done.
Adding a custom product
While the offer is in the status Open Request, add custom items (e.g. “one off” items which do not exist in the catalog) from the Items screen as follows:
- Click the down arrow alongside Add Product and select Add Custom Item.
- Enter the Name for the custom item.
- Enter the VAT (numerical value only, the % is added automatically) and Offer Price.
- Click the tick ✔ icon when done.
Adding a discount/credit item
While the offer is in the status Open Request, add a discount or credit item to the offer total as follows:
- Click the down arrow alongside Add Product and select Add Credit.
- Enter the Name for the discount/credit item (note that this will be visible to the customer in the offer).
- Enter the amount to credit off the total offer in the field Offer Price. Note that the value must be minus in order to be deducted, so -10 will deduct 10 EUR (or whatever currency has been selected) from the offer total.
- Click the tick ✔ icon when done.
Settings
The Settings screen contains the following field:
- Offer days valid: enter a value here for the number of days the offer should remain valid for.
| Any custom fields you have created will also be displayed on this page. |
Messages
A list of messages (if any exist) is displayed on this screen, grouped by sender and date.
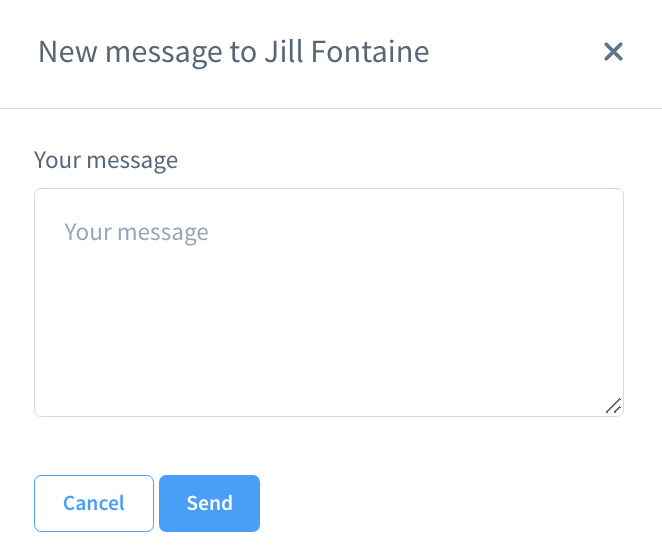
- To send a new message to the customer, click Add Message. Enter the message text into the free text field and then click Send. The customer will receive the message in their Shopware control panel.
Comments
A list of comments (if any exist) is displayed on this screen, grouped by sender and date.
- To add a new comment, click Add Comment. Enter the comment text into the free text field and then click Send.
- Comments are only for internal use in the Shopware Administration area and are not visible to customers. It allows an administrator, or several administrators, to add notes regarding the status of the offer.
Creating an offer in Shopware Administration
Although the typical use case is that the customer creates an offer request from the shop frontend, there is also the possibility for an administrator to create an offer in the backend. This is useful if the customer has made an offer request by telephone.
From the Offer Overview page:
- Click Create Offer.
- If the customer already has a shop account, select them from the Customer dropdown menu. If not, click Add New Customer to create an account for them and fill in the fields according to the information available (the customer can complete the missing information themselves if necessary). Click Save when done.
- Select the required Currency for the offer and click Save.
The offer is created and added to the list of current offers. To edit the offer, see Edit Individual Offer above.


